Lab 01: Your repository from the template
You’ll make your own public repository from Tiny Tapeout’s analog template and fill in the two files its checks read. Then you’ll commit a placeholder layout, the empty 1x2 frame that Tiny Tapeout’s own script draws, and keep going until both of the template’s workflows pass on a commit you made, the viewer job included. You’ll come back to this repository in later labs.
Package: labs/lab-01-your-repo-from-the-template/
Before you start
- Read Getting started, Git in one page and Templates, forks and clones.
- You need IC101 done (the workbench desktop opens and you can get a terminal), a GitHub account, and about 2 GB of free disk for the course tools.
This lab takes about 1 h 15 min. Half of that is waiting for GitHub’s runners, which is a good time to read ahead.
In the outputs below, the top module is tt_um_yourname_ic102, and yours will have your own username in it. The repository is ttsky-ic102-a, the name the rest of the course uses for it.
Part 1: Load the course
If you haven’t set up the workbench yet, do IC101 Lab 03 first.
From your
workspaceclone, start the desktop (./scripts/start_vnc.sh, orscripts\start_vnc.baton Windows), open http://localhost/ and open a terminal on the desktop. Every command in this course runs in that terminal.Load the environment and get the course files:
. /foss/designs/common/.designinit   # in every new terminal
mod add ic102-a                      # first time only: clones github.com/uoftasic/ic102-a
mod ic102-a
You should see the
ASIC-EDU: PDK=sky130A ...banner, then this frommod add:Cloning https://github.com/uoftasic/ic102-a.git into /foss/designs/modules/ic102-a Cloning into '/foss/designs/modules/ic102-a'... OK module ready: /foss/designs/modules/ic102-a run: mod ic102-a cwd: /foss/designs/modules/ic102-amod addleaves you in the course folder, andmod ic102-aprints the samecwd:line again, as the last line.Install the course’s copy of precheck’s tools. They’re installed alongside the workbench’s own tools, in
labs/common/tt-tools/.local. That folder is on your own disk, so you only do this once:cd labs/common/tt-tools make install make check-toolsmake installtook 85 s on one CPU core with a fast connection, and the tools take up 1.8 GB. Your tools and the runner’s tools explains why the course installs these at all.make check-toolsshould end with this table:Tool Runner (pinned) Here Workbench Status ---- --------------- ---- --------- ------ Python 3.11.18 3.11.16 3.12.3 ok (3.11) Magic 8.3.568 8.3.568 8.3.681 ok KLayout 0.30.8 0.30.8 0.30.11 ok klayout (pip) 0.30.13 0.30.13 0.30.11 ok gdstk (pip) 0.9.52 0.9.52 1.0.1 ok yowasp-yosys 0.63.0.0.post1107 0.63.0.0.post1107 - ok ciel 3.2.0 3.2.0 2.6.1 ok sky130A PDK 0536d02d875c 0536d02d875c 026824c7969c ok tt-support-tools 9d13ff3e3e62 9d13ff3e3e62 - ok All pinned tools are installed at the runner's versions.
| If you see | Do this |
|---|---|
mod: no such module: ic102-a |
You ran mod ic102-a before mod add ic102-a. |
The read operation timed out during make install |
The PDK’s download server didn’t answer in time. Run make install again; it starts from the part that failed. |
Anything marked MISSING in make check-tools |
Run make install again and read the last lines it prints. |
For anything else, see IC101’s Troubleshooting page. The tools’ README has more rows.
Check: make check-tools ends with All pinned tools are installed at the runner's versions.
Part 2: Your GitHub settings
This part sets up two things the rest of the course needs: an email address for your commits, and a way for the workbench to push to GitHub.
On GitHub, open Settings › Emails, turn on the “Keep my email addresses private” switch, and copy the no-reply address that GitHub then shows, which has the form
ID+USERNAME@users.noreply.github.com. Git in one page says why.Make a token for the workbench to push with: Settings › Developer settings › Personal access tokens › Fine-grained tokens › Generate new token. Give it:
- Token name
IC102 workbench, and Resource owner your own account, which is what the form starts with. - Expiration 60 days. The form starts at 30 days, so pick 60 days from its menu.
- Repository access: All repositories. The form starts at “Public repositories”, which gives read access only.
- Permissions: with the Repositories tab selected, click + Add permissions and tick Contents and Workflows in the list that opens. Workflows comes in at “Read and write”, the only choice it has, but Contents comes in at “Read-only”, so change its Access menu to “Read and write”. GitHub adds Metadata by itself, marked “Required” and “Read-only”. Leave everything else as it is.
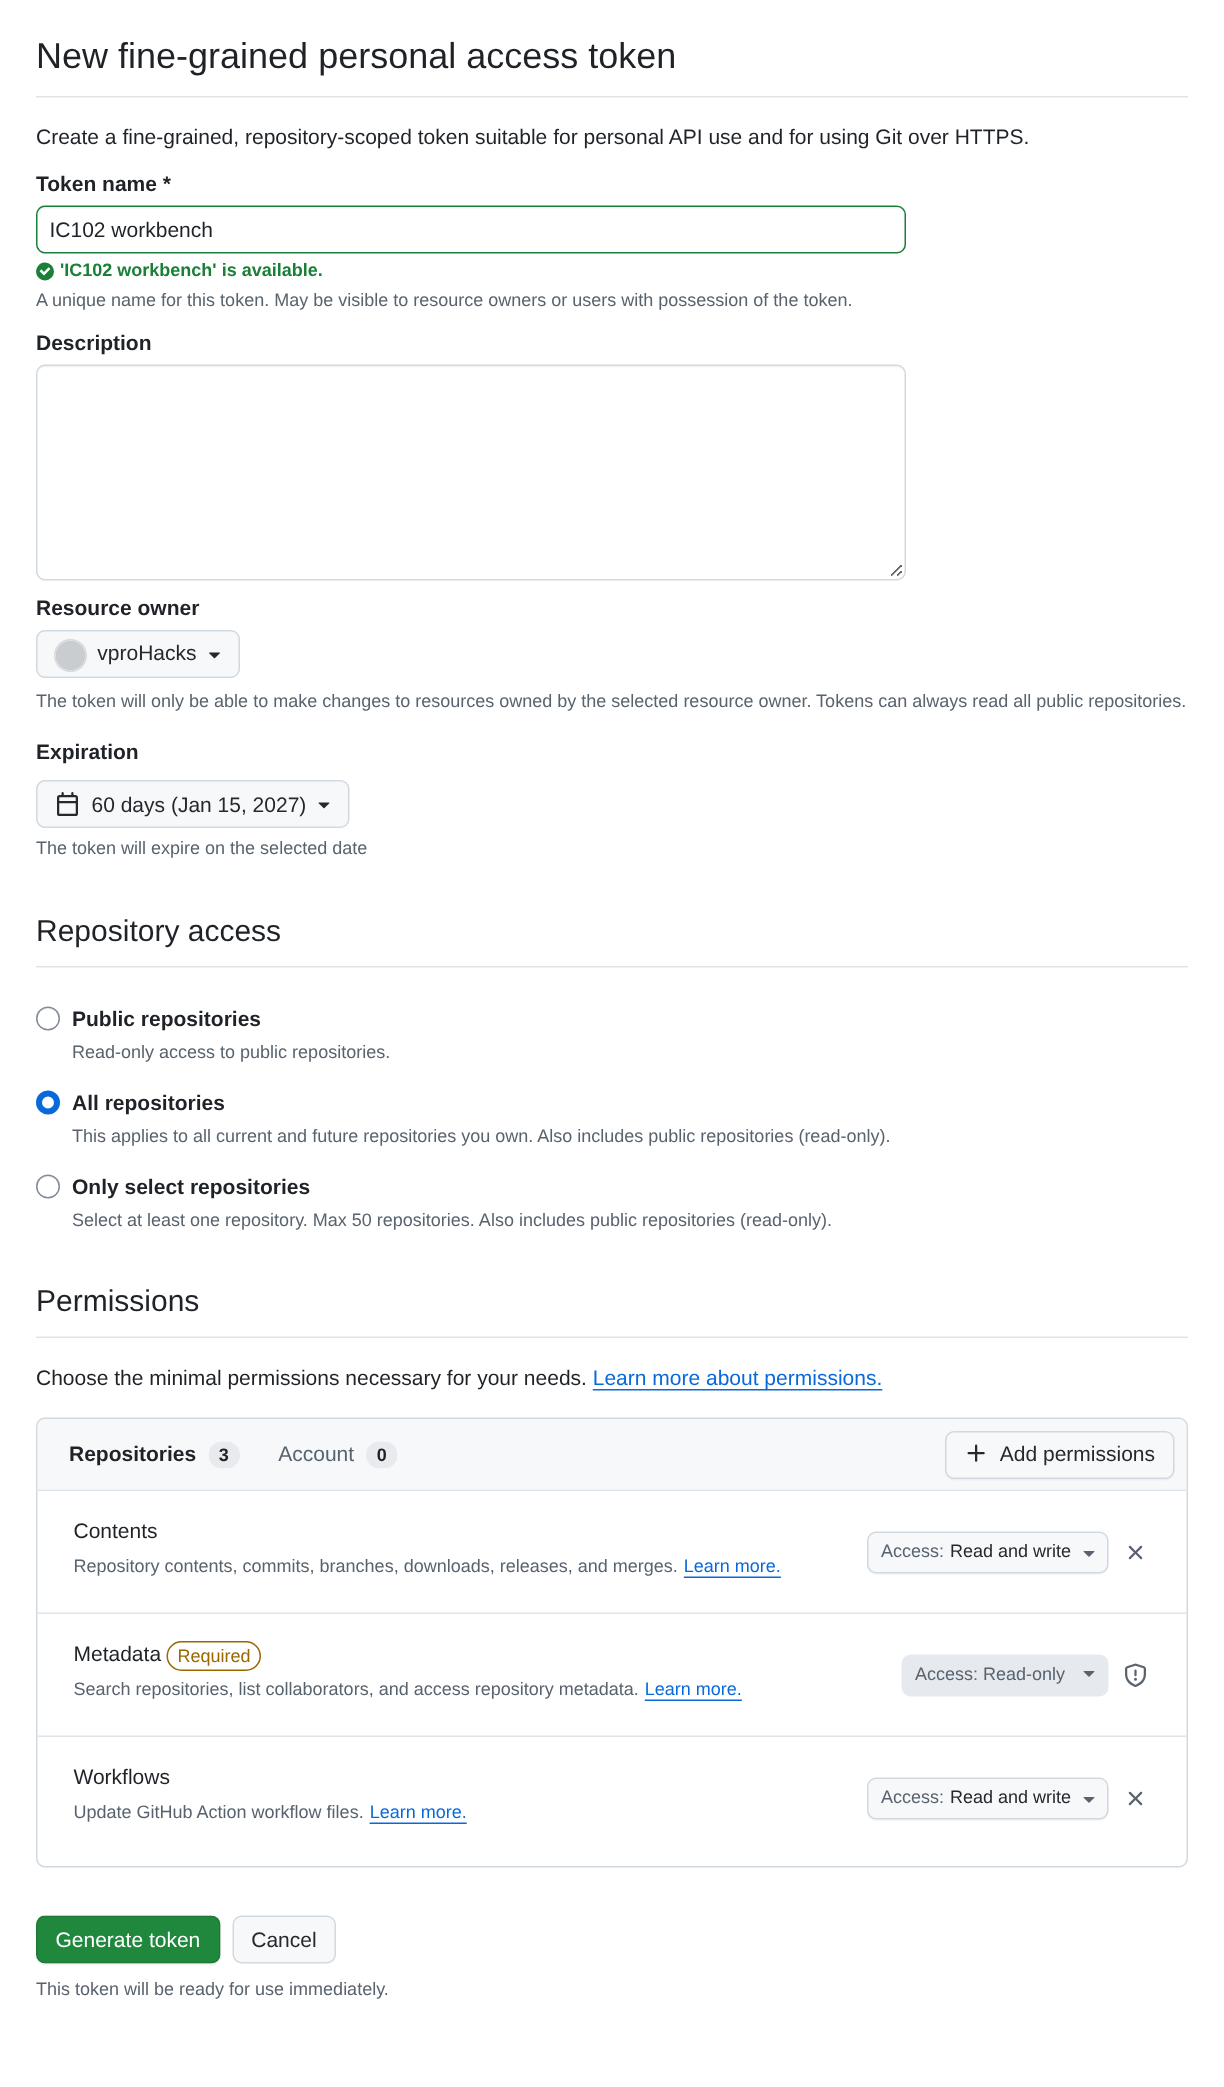
The new-token form filled in as above, before Generate token is pressed. The resource owner is the account we tested with, and its avatar is replaced with a grey disc. Press Generate token, and copy the token into your password manager now, because GitHub shows it only once.
Getting started explains why it’s this kind of token, why it needs Workflows as well as Contents, and why it lives in your password manager rather than in a file.
- Token name
Check: you have the no-reply address and the token saved somewhere you can paste from.
Part 3: Make the repository
What does a repository made from the template contain, and which of its workflows pass before you’ve changed anything?
Open https://github.com/TinyTapeout/ttsky-analog-template, click Use this template › Create a new repository, choose your own account as the owner, name it
ttsky-ic102-a, make it Public, and click Create repository. It has to be public, because GitHub Pages, which theviewerjob needs, works only on public repositories on a free account.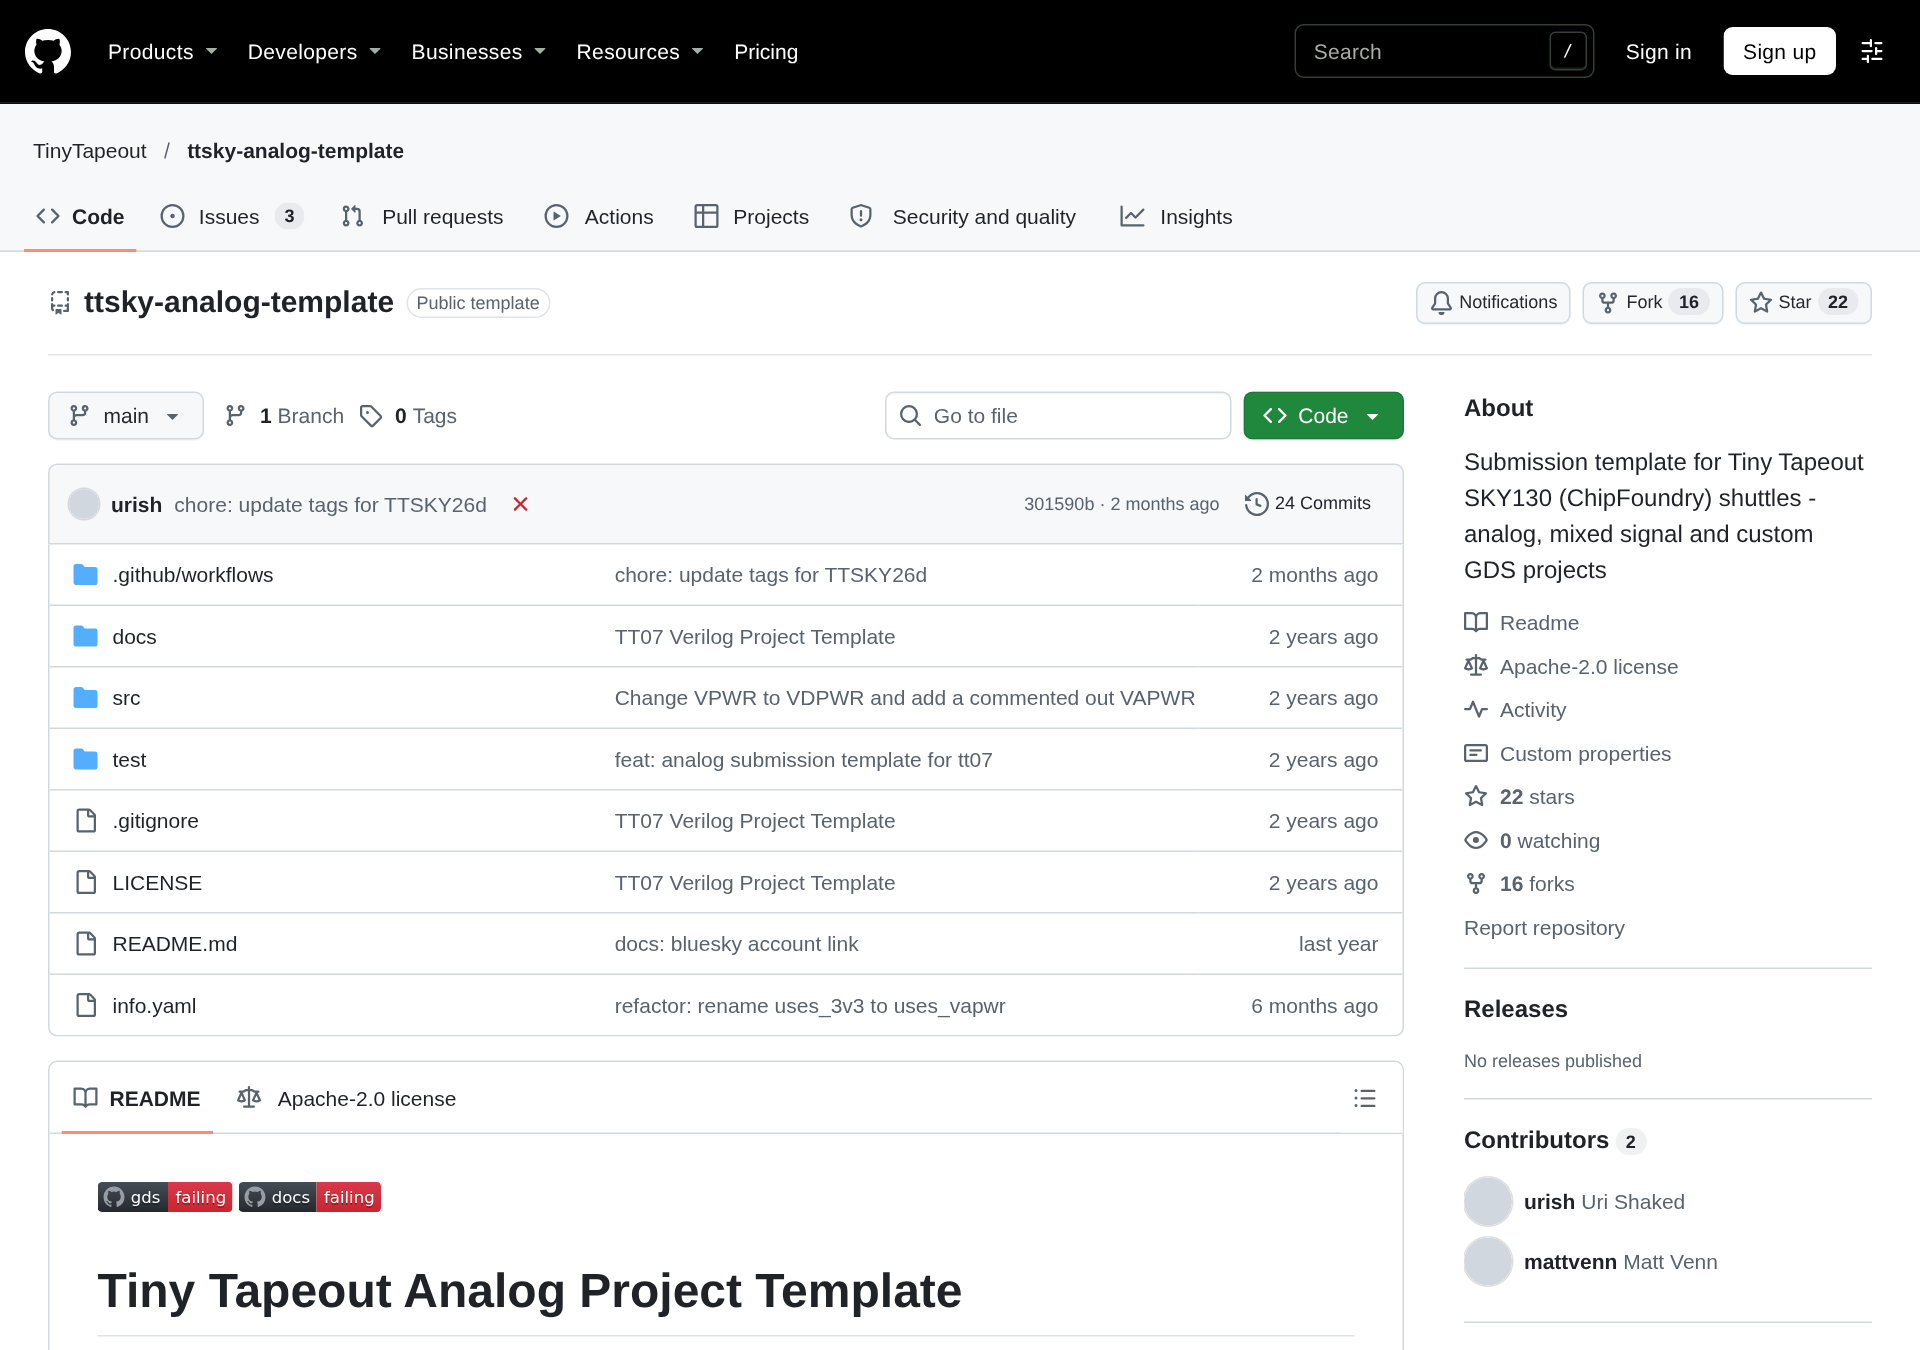
The analog template on GitHub, with its “Use this template” button. 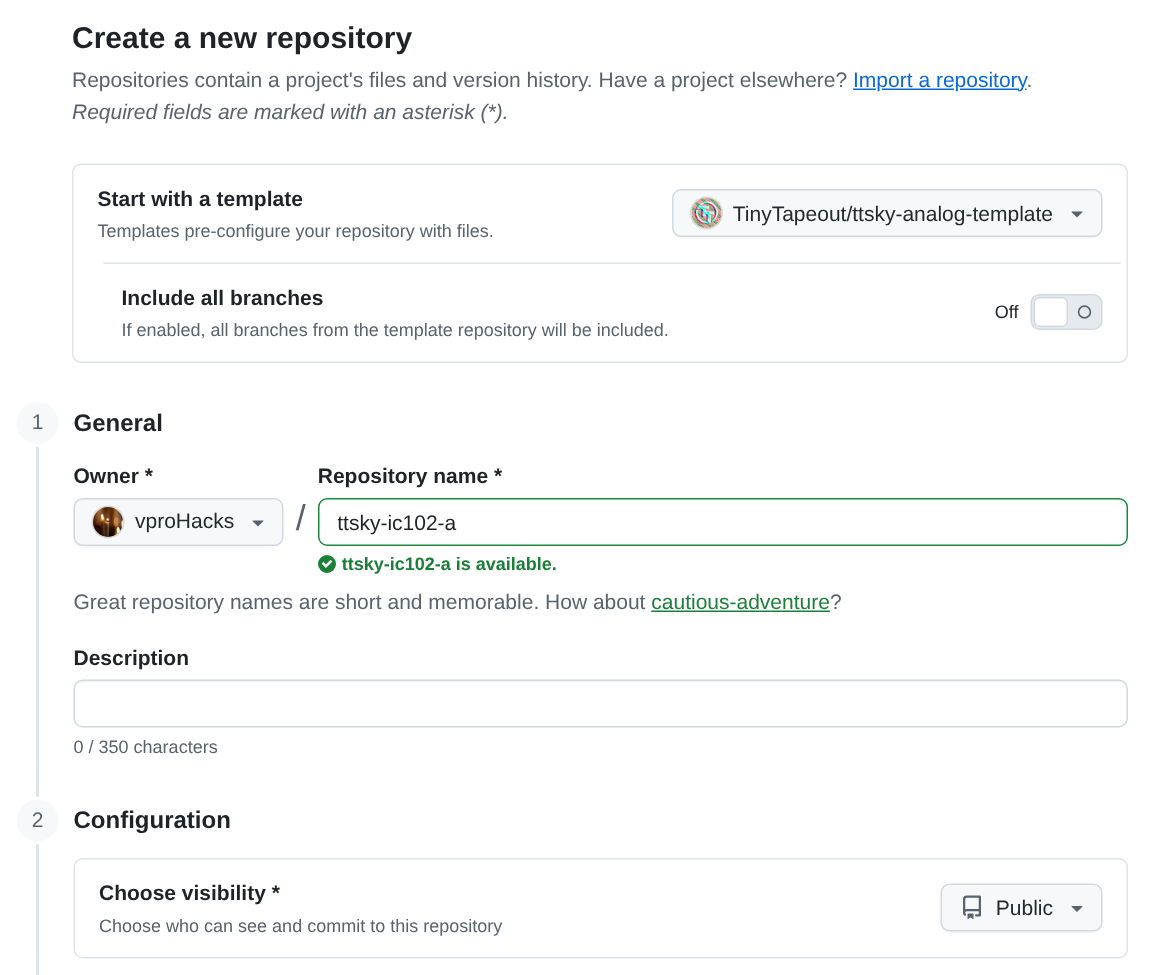
Creating a repository from the analog template: your own account as the owner, “Include all branches” off, and Public. Before you look at the Actions tab, write down how many workflow runs you expect to find there already, and whether each will pass. The template’s
.github/workflows/has two files.Open your repository’s Actions tab. You should see two runs,
docsandgds, both on the commit “Initial commit”, and both red, as they were on the team’sasic-zoo-templateon Nov 11,TipAnswerBoth workflows run on every push (
on: push), and creating the repository pushed its first commit.docsfails becauseinfo.yamlanddocs/info.mdstill hold the template’s empty values and placeholder text.gdsfails because the template has no layout in it: thegdsjob looks forgds/tt_um_example.gdsand the file doesn’t exist. You’ll see both messages in Part 4.Clone it into the workbench, into a
projectsfolder of your workspace:mkdir -p /foss/designs/projects && cd /foss/designs/projects git clone https://github.com/YOUR-USERNAME/ttsky-ic102-a.git cd ttsky-ic102-a git log --onelineYou should see
Cloning into 'ttsky-ic102-a'...and a log of exactly one commit, “Initial commit”, whose hash is your own. The template’s own history has been left behind, as Templates, forks and clones says it would.Tell git who you are, and to remember your token, in this repository:
git config user.name "Your Name"
git config user.email "ID+USERNAME@users.noreply.github.com"
git config credential.helper 'cache --timeout=28800'
The third line keeps your token in memory for 8 hours after you first type it, so you’re asked for it about once a session. Leave out
--global. A global setting goes into the container’s home folder, which is thrown away whenever the workbench restarts, and your next commit would then stop with this:Author identity unknown *** Please tell me who you are. ... fatal: unable to auto-detect email address (got 'designer@41bf5069a52d.(none)')A setting without
--globalgoes into.git/configin the repository, which is on your own disk, so it’s still there after a restart. You’ll repeat these three lines in each repository you clone or create in this course.See which version of Tiny Tapeout’s actions your workflows run:
grep -n "uses:" .github/workflows/*.yamlYou should see four lines that end in
@ttsky26d(the docs action indocs.yaml, andcustom_gds,precheckandvieweringds.yaml), plus two that useactions/checkout@v4. Your repository’s own workflow files now name that tag, and they keep naming it whatever Tiny Tapeout later changes in its template. The analog workflows goes through what each of the threegds.yamljobs does.
Check: git log --oneline shows one commit, and git config user.email prints your no-reply address.
Part 4: Fill in info.yaml and docs/info.md
Which of the docs workflow’s complaints can you fix before you push?
Add the course’s layout kit to your repository. The kit includes a
Makefilewhosemake docsruns the same check as thedocsjob:/foss/designs/modules/ic102-a/labs/lab-01-your-repo-from-the-template/start.sh . make docsstart.shlists what it added (Makefile,layout/, and a line in.gitignore). Frommake docsyou should then see:## Errors in info.yaml - Project title cannot be empty - Project author cannot be empty - Project description cannot be empty - Please fill in the 'pinout' section ## Errors in docs/info.md - Missing 'How it works' section in docs/info.md - Missing 'How to test' section in docs/info.md make: *** [Makefile:100: docs] Error 1That’s the list that the
docsrun on the team’shart-1printed on GitHub, word for word, becausemake docsruns the same function as thedocsjob, from the same commit of Tiny Tapeout’s support tools.Edit
info.yaml. Fill intitle,authoranddescription; the author is public, so write whatever you’re happy to see in a datasheet. Settop_moduletott_um_followed by your GitHub username and_ic102, in lower case with any-changed to_, because the name becomes a Verilog module name. In thepinoutsection, giveua[0]andua[1], the first two analog pins, a description each, such as"inverter input (not connected yet)"and"inverter output (not connected yet)". Leaveanalog_pins: 2andtiles: "1x2"as they are.Replace the two placeholder sentences in
docs/info.md, “Explain how your project works” and “Explain how to use your project”, with a sentence or two of your own.In
src/project.v, changemodule tt_um_exampleto your top module’s name.Run
make docsagain. You should seeDocumentation check passed successfully.Commit and push:
git add -A
git commit -m "Fill in info.yaml and docs/info.md, and add the IC102-A layout kit"
git push
git asks for a username and a password: give your GitHub username, and paste the token as the password. The cache you set up in Part 3 keeps it for 8 hours, and forgets it when the workbench restarts.
Before the runs finish, predict which of the two workflows will be green this time. Then open the
gdsrun, then itsgdsjob, then the failed step, and write down its first error line.You should see
docsgreen andgdsred, with the message that every push to the team’sasic-zoo-templateproduced before it had a layout. That repository still had the template’s top module, so its message namestt_um_examplewhere yours names your own:cp: cannot stat 'gds/tt_um_example.gds': No such file or directory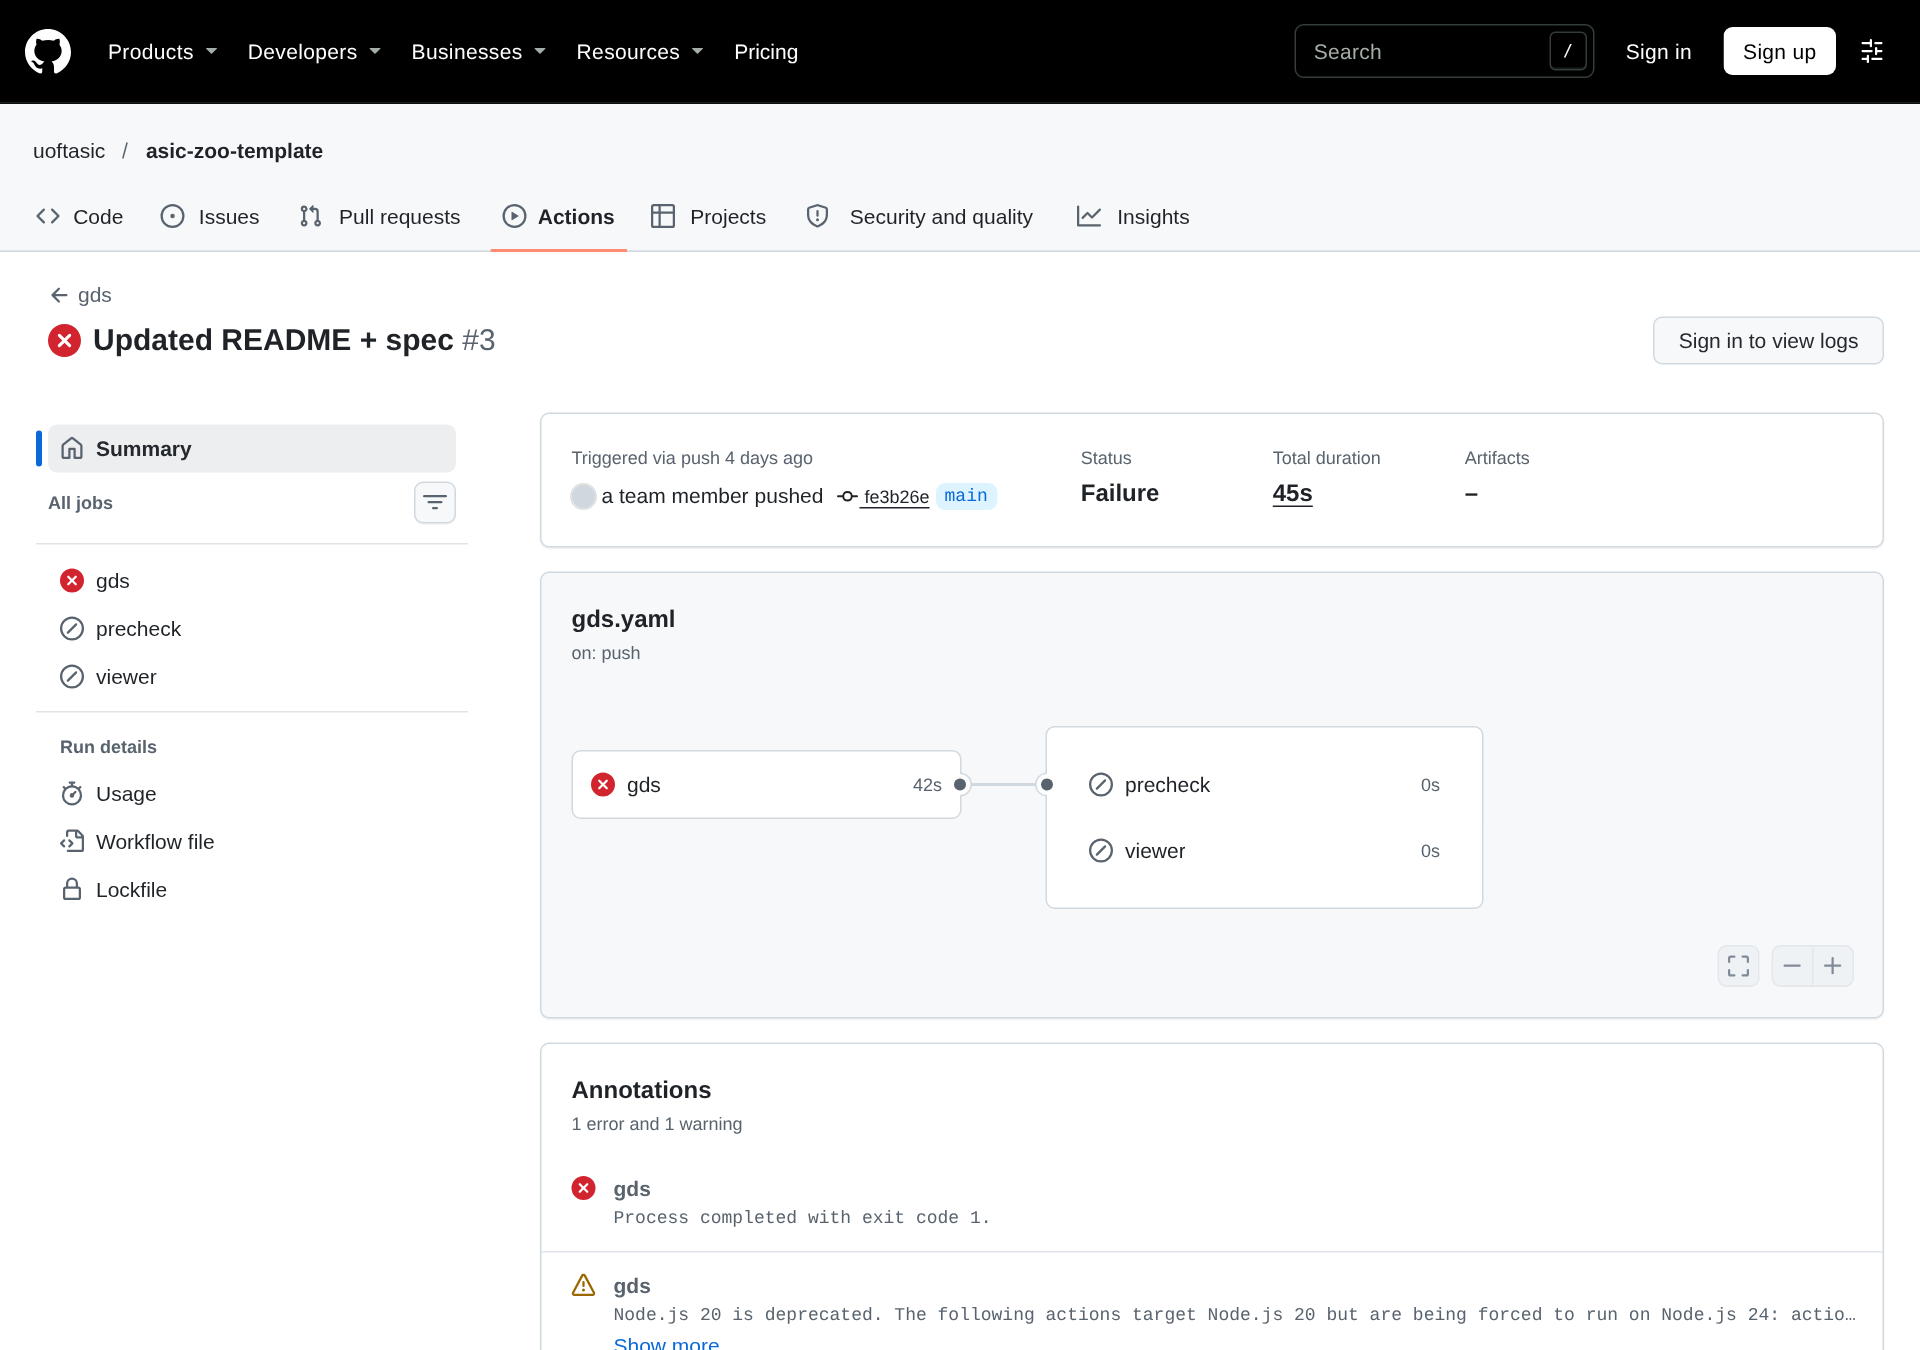
The same failure in uoftasic/asic-zoo-template: gds red after 42 s, precheck and viewer skipped. The person who pushed is shown as a team member. TipWhy are precheck and viewer grey?Both are declared with
needs: gds, so they run only if thegdsjob succeeds. It failed at its copy step, so they were skipped.
Check: the docs run on your commit is green.
Part 5: A placeholder layout
What’s the least layout that passes precheck?
Run
make. You should see:layout/init.tcl draws a cell called 'tt_um_analog_example', but top_module in info.yaml is 'tt_um_yourname_ic102'. Set TOP_LEVEL_CELL in the settings block of layout/init.tcl to tt_um_yourname_ic102. make: *** [Makefile:71: check-top] Error 1layout/init.tclis Tiny Tapeout’s ownmagic_init_project.tcl, copied unchanged, and its comments ask you to change the settings block at the top. ChangeTOP_LEVEL_CELLto your top module. A GDS whose top cell has a different name fromtop_modulefails precheck, as you’ll see in Lab 02.Run
makeagain. You should see:magic: the kit's frame and power stripes (layout/init.tcl) magic: your additions (layout/wires.tcl), then GDS and LEF wrote gds/tt_um_yourname_ic102.gds and lef/tt_um_yourname_ic102.lefThe frame has every pin of the 1x2 tile, a VDPWR and a VGND stripe on metal 4, and nothing else.
layout/wires.tcladds a 9 µm stub of metal 4 toua[0]and toua[1]. Read its comment: why does an empty frame need those two stubs?TipAnswerinfo.yamlsaysanalog_pins: 2, and precheck’s analog pin check fails unless each of the first two analog pins touches some metal (and has a description in the pinout, which you gave it in Part 4). An empty frame has nothing onua[0]orua[1]. The stubs aren’t connected to anything; in Lab 03 you replace them with wires to an inverter.Run precheck on it before you push, with the same tool versions the runner uses:
make precheckIt takes about 45 s. You should see
INFO: Precheck passed for .../tt_um_yourname_ic102.gds! 🎉and a table of 15 checks, every one ✅, fromMagic DRCtoVerilog syntax check.Before you commit, check what git will take:
git statusIt should list your change to
layout/init.tcland the newgds/andlef/folders, but nottt_submission/orlayout/build/. The template’s.gitignoreand the kit’s line in it keep precheck’s and Magic’s scratch files out of git, sogit add -Aleaves them behind. Then commitlayout/,gds/andlef/, and push:git add -A git commit -m "Add the 1x2 frame with stubs on ua[0] and ua[1]" git pushPredict which jobs of the new
gdsrun will pass, then open it. You should seegdsandprecheckgreen andviewerred. We madevproHacks/ic102-test-afrom the template to test this lab, and itsgdsrun on Nov 16, 2026 took 3 min 52 s. Itsviewerjob’s log had this line, and yours will have one like it:##[error]Error: Failed to create deployment (status: 404) with build version e9a6f474deb92b2898e062ddb8f54bcf052b1d73. Request ID 5868:1C0C8:4B853B6:F3D6856:6AFAB74A Ensure GitHub Pages has been enabled: https://github.com/vproHacks/ic102-test-a/settings/pagesYours has its own build version and request ID, and your repository’s address at the end.
Check: precheck is green on GitHub, and its table on the run’s summary page matches the one make precheck printed.
Part 6: Turn on Pages
How do you get the viewer job green without changing a file?
In your repository, open Settings › Pages, and under Build and deployment set Source to GitHub Actions.
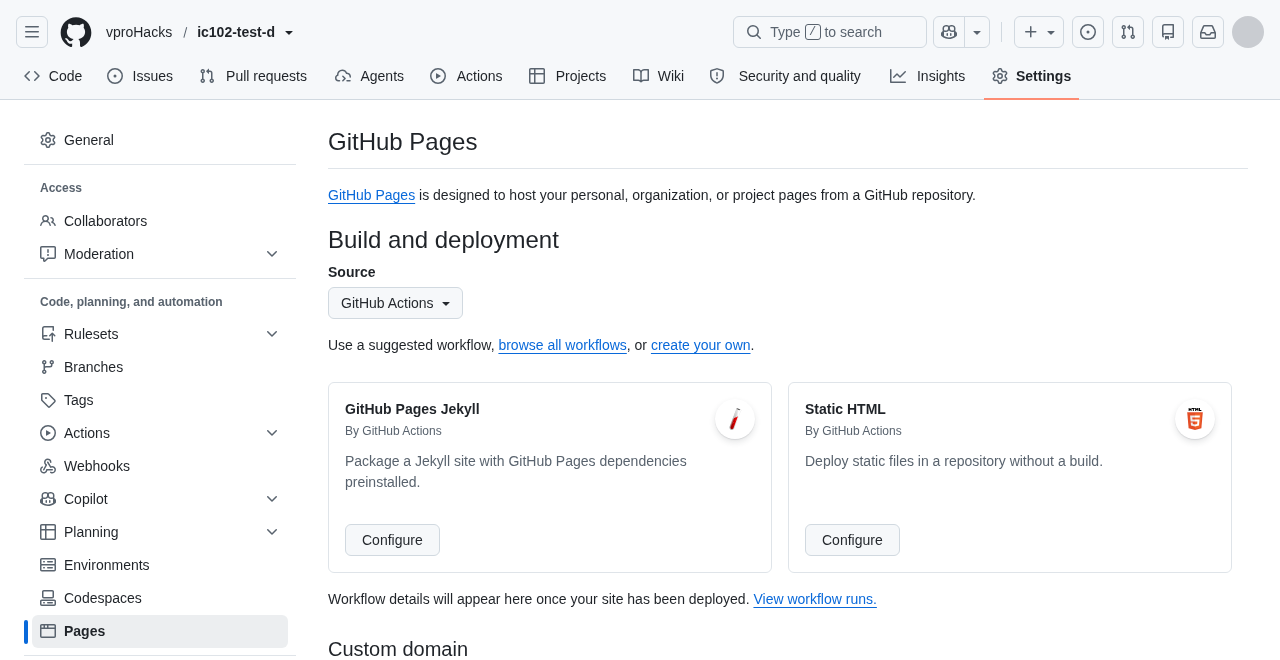
Settings › Pages, with the source set to GitHub Actions. Don’t press “Re-run failed jobs” on the red run. The
vieweraction atttsky26duploads an artifact calledgithub-pageson every attempt, and a re-run keeps the first attempt’s, so the re-run fails withMultiple artifacts named "github-pages". Reading a workflow file explains why. Start a new run instead: Actions › gds › Run workflow › branchmain› Run workflow. (A new push would start one too, but you have nothing to push.)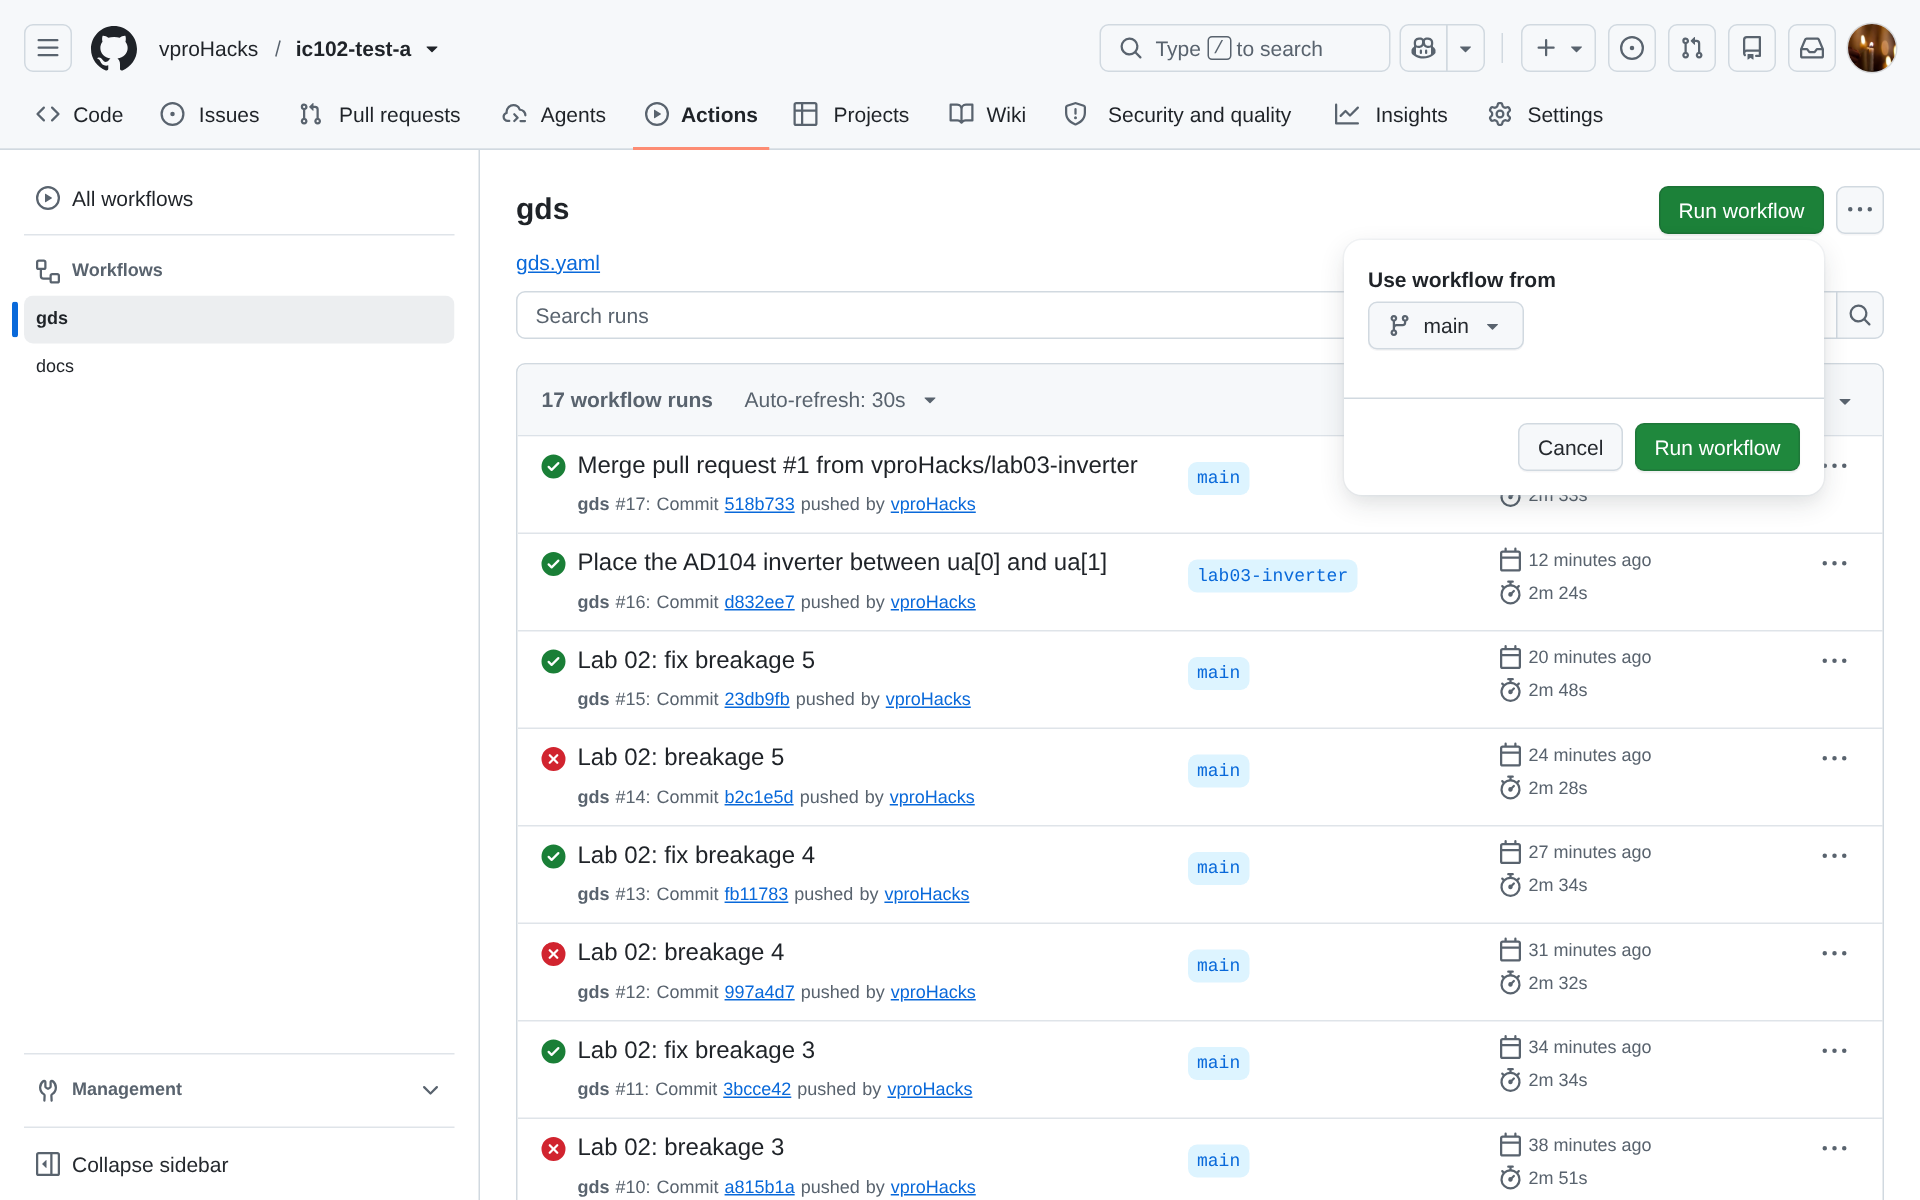
Starting a new gds run by hand: Actions, the gds workflow, and the Run workflow dropdown with branch main. You should see all three jobs green. The
viewerjob’s summary, on the run’s summary page, has an “Open 3D viewer” link, andhttps://YOUR-USERNAME.github.io/ttsky-ic102-a/now redirects to Tiny Tapeout’s viewer, with your frame and its two stubs in it.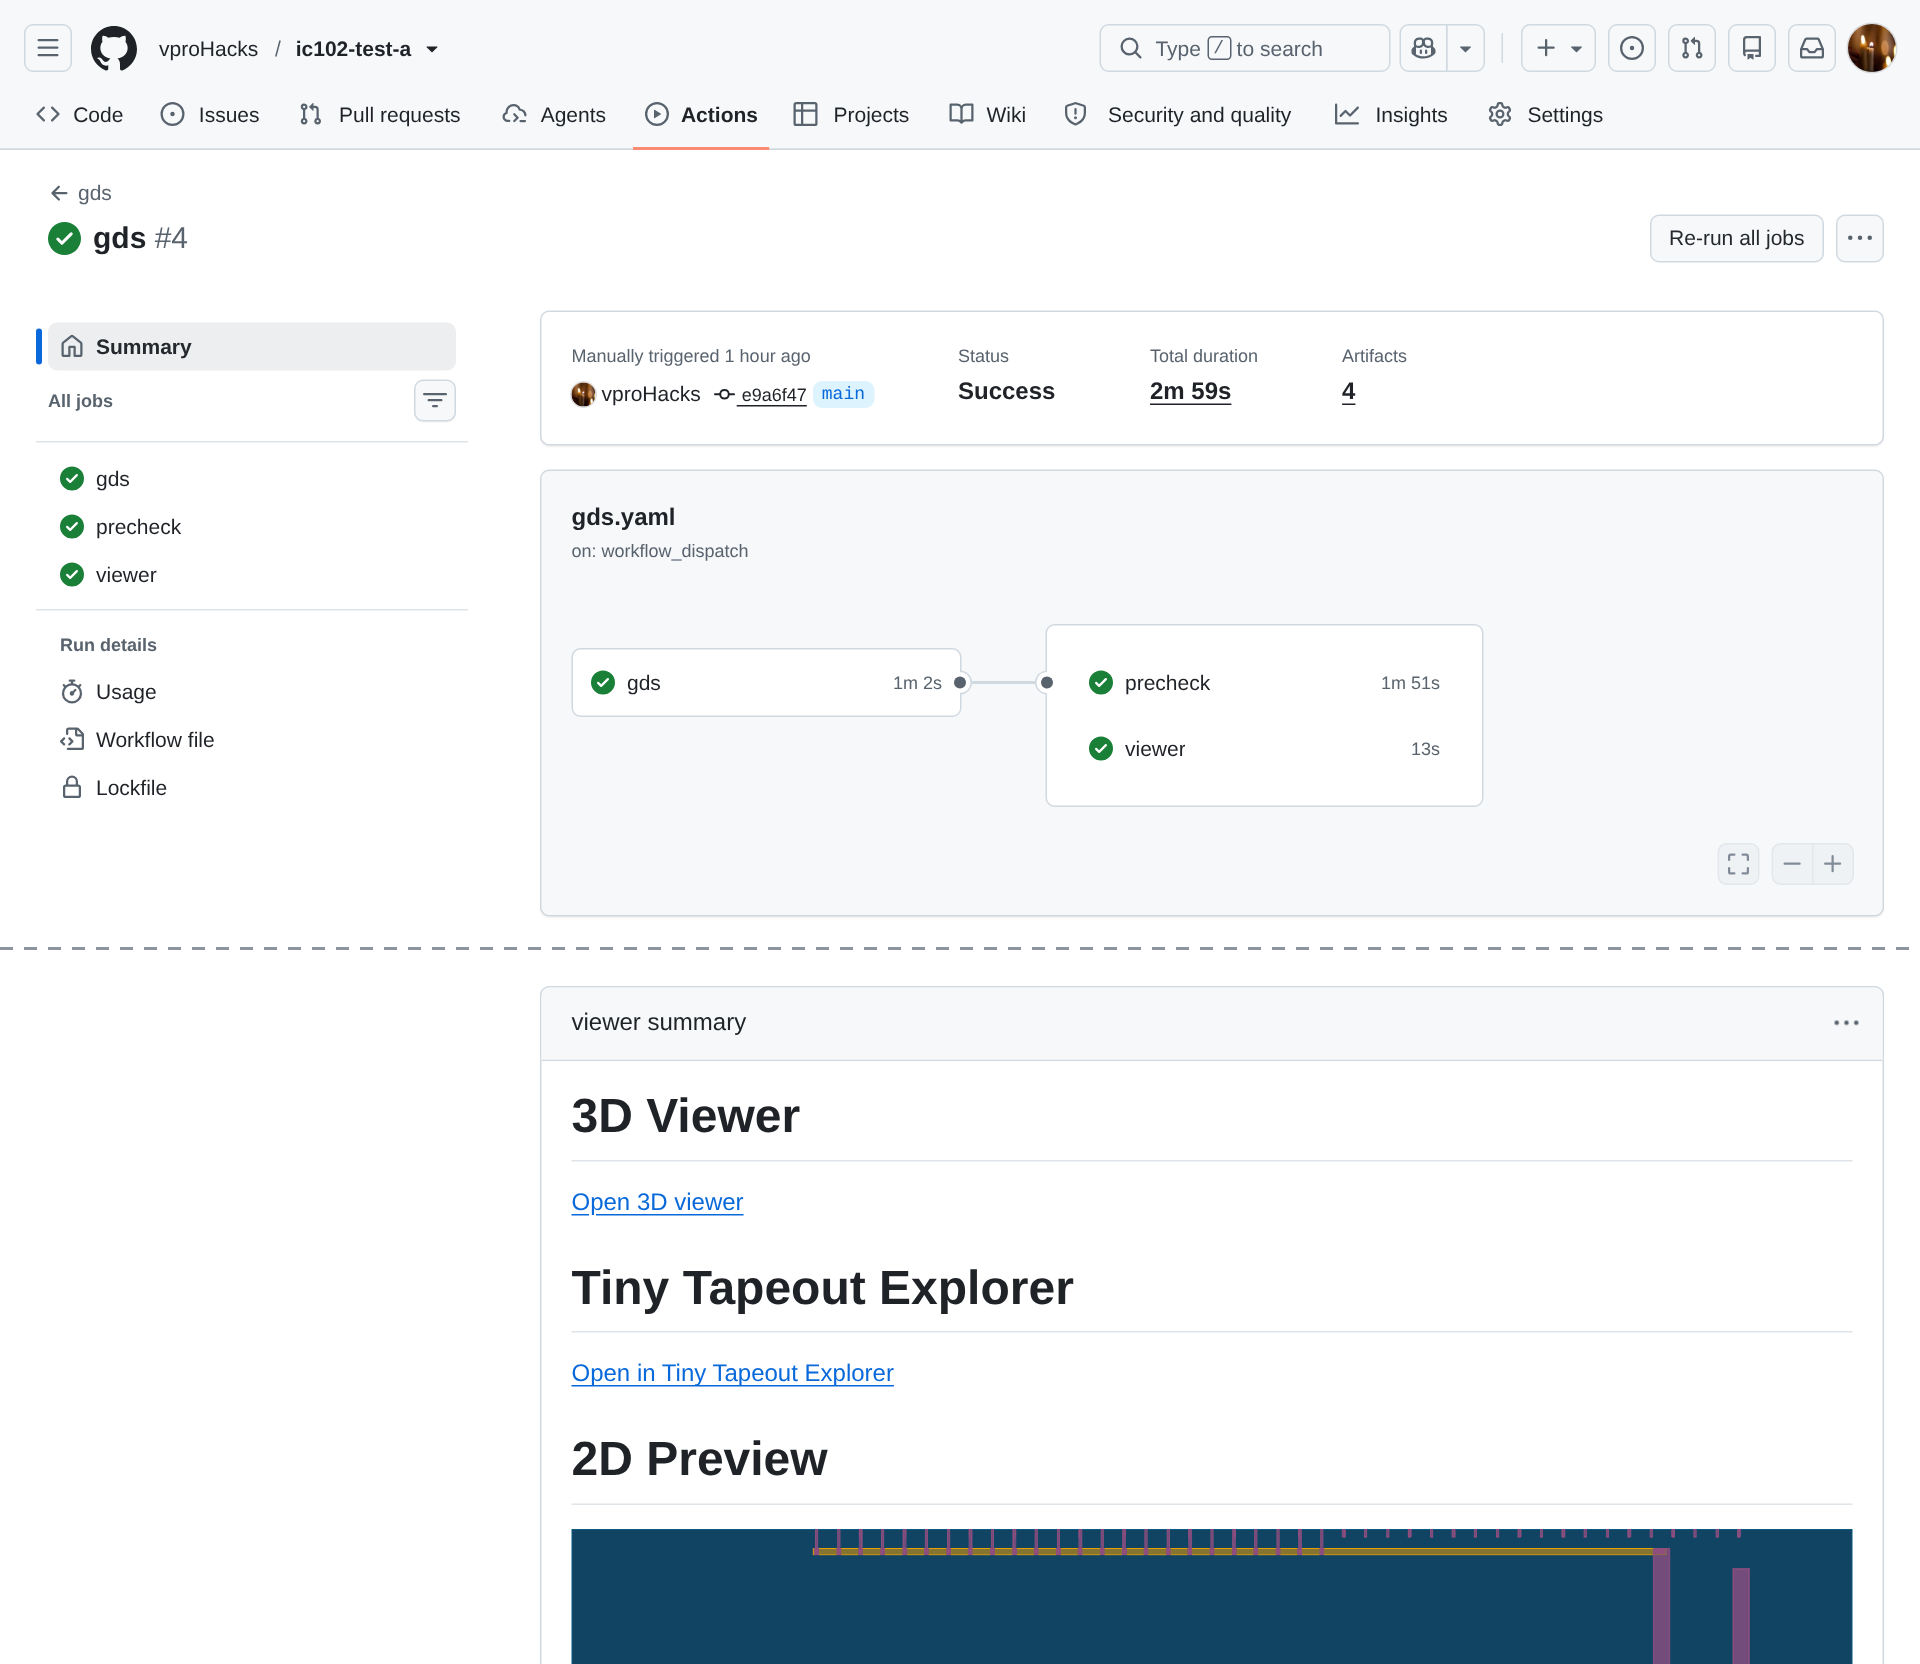
A gds run with every job green, started with Run workflow in our test repository, and further down its summary page, the viewer job’s links. The 2D preview under them is loaded from the Pages site, so it always shows the layout deployed last.
Check: the run is green from end to end.
Finishing
You’re done when the latest commit on your repository’s main, a commit you made, has a green docs run and a green gds run with all three jobs (gds, precheck and viewer) passed.
Questions:
Your Part 6 run was started by hand, not by a push. Which commit did it check?
TipAnswerThe latest commit on the branch you chose,
main, which was your Part 5 commit. “Run workflow” runs the workflow file and the files as they are on that branch’s latest commit.The
gdsjob in Part 4 failed in well under a minute. When it passed, in Parts 5 and 6, it still took only about a minute: 61 s on the Part 5 push and 62 s in the Part 6 run in our test of this lab, and each run’s summary page gives your own times. A digital project’sgdsjob took between 207 s and 1,056 s in the team’s repositories. Why is the analog one so much faster even when it passes?TipAnswerBecause it doesn’t build anything. A digital project’s
gdsjob runs LibreLane to turn Verilog into a layout, whereas the analog template’scustom_gdsstep only copies the GDS and LEF you committed, converts the GDS to OASIS and renders a picture of it. All the layout work happened on your machine, when you ranmake.
Submit: nothing for this lab. Keep the repository; Labs 02, 03 and 05 use it.
Next on the Course path: read What a cloud runner is, Reading a workflow file and The analog workflows, then do Lab 02: Read the red X.